
By Caitlin Wilson 11 February 2025
Late February to early March is the time many gardeners will eagerly start inventorying their seed stash and planning their gardens. If you haven’t got the itch yet or are unsure on where to start, read on!
What do I need to start seeds?
There are many products on the market to make seed starting easier, but what do you actually need to get started? Not as much as you think! Really all you need to get started are seeds you want to plant, dirt, a container to hold your dirt, and water. Everything else is extra. Some stuff can help your garden thrive, some stuff is nice to have, and some stuff is just a gimmick.
For dirt, you can use a bag of potting soil from the store, some extra dirt from your property, or you can make you own blend. You don’t have to buy the uber expensive fanciest potting soil you can find to get good results! If you want to buy very fancy potting soil, that’s fine too. If you would like to make your own potting soil see below for the general purpose recipe we use.
For dirt containers, you can reuse what you have if you have purchased plants in the past. These already have drainage holes and are designed to hold plants. If you are reusing pots or seedling trays, be sure to wash with soap and water and spray with 70% alcohol to sanitize. This will help kill off any soil diseases that may be dormant in your pots and prevent issues once your seedlings sprout.
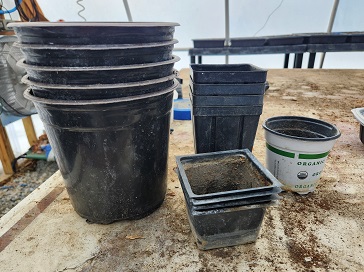
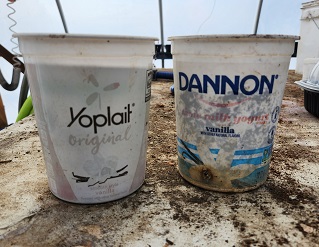
If you don’t have any pots to reuse, you can use old food containers, such as containers that used to hold margarine, yogurt, sour cream, milk jugs, solo cups, etc. Any food containers that are number 5 plastic work really well for this purpose. Be sure to drill or punch a few holes in the bottom of these containers in order to allow water to drain out of the bottom.
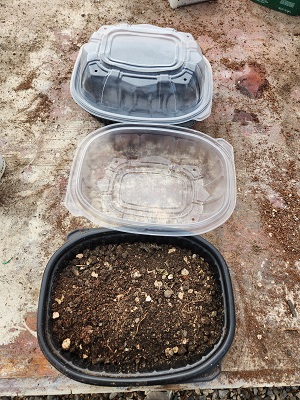
If you would like a way to retain humidity for your seeds, try a use rotisserie chicken container! There are already holes in the lid and the container is deep enough to support the roots of many seedlings. Humidity domes help keep the seedlings moist by holding in the water from the soil. Humidity domes are sometimes required for certain tropical plants because they come from very wet environments and therefore lose water more easily than plants adapted to dry air.
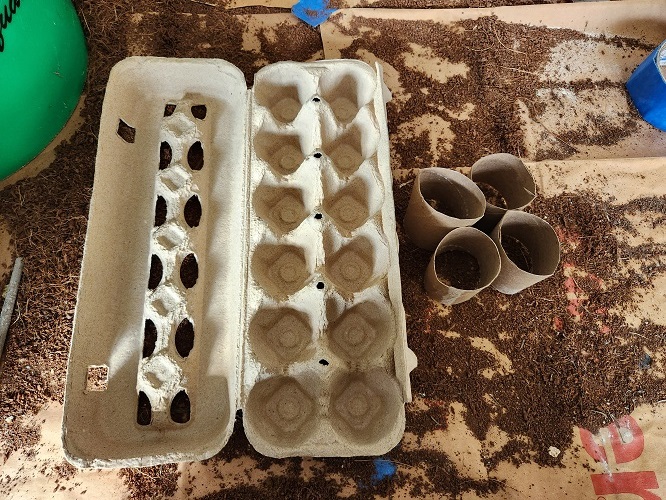
If you prefer plastic free options, you can use egg cartons, toilet paper rolls, paper towel tubes, etc. Simply cut the cardboard roll into 2 inch tall sections and place on a shallow tray like a spare baking tray or shallow storage tote. You can fill either side of the egg carton with dirt and use as is.
Make your own seed starting mix
Why would you want to make your own seed starting mix? If you want to start a lot of seeds, it can save you money. If you like to have more control over your end product, it can also help you do that.
The easiest seed starting mix is to just use sterile, rehydrated coco coir. You can get a brick of this at your local big box store or you can find it online. Rehydrate according to the directions and put the coco coir into your seed starting container. This option works well if you want to start a lot of seeds in small, shallow containers. It is a sterile medium that holds water well. Seeds have all the nutrients they need to sprout and don’t have any need for nutrients until they have sprouted. The advantage to this method is the coco coir is sterile so your seedlings won’t encounter germs when they sprout. The disadvantage of this method is the coco coir does not contain nutrients, so the seedlings will need to be transferred to potting soil as soon as they emerge from their seed coat.
The other option for seed starting is to start your seeds directly in potting soil. This method is usually not sterile so your seeds could be more susceptible to diseases when they sprout. The advantage with this method is that it reduces the amount of times you must handle your seedlings because you don’t have to transplant them until they outgrow their container. Some people will bake their potting soil on low in the oven to create sterile seed starting mix, but that also kills the beneficial bacteria in the soil. So this may not be a desirable step for a lot of us.
One thing you can do to help create stronger seedlings is to inoculate your seeds and transplanted seedlings with mycorrhizae. This is a beneficial fungus that forms a partnership with the roots of seedlings/plants. The mycorrhizae live on the end of the roots of your plant and help the plant take more nutrients out of the soil. This makes the plant healthier and more resistant to disease. You can buy mycorrhizae as a powder and you simply dust the seed or the hole you are planting in with the powder when you plant. The powder needs to come into contact with the seed or root and the association will be formed. This fungus is found all over in healthy forests and helps the trees and plants thrive. It can also be found in actively managed compost piles. So if you have a compost pile at home, you can use the compost in your seed starting mix to perform the same function. Mycorrhizae are not required to get good results starting seeds, but it can be very helpful for getting hard to start seeds to thrive.
A recipe we like for an all purpose potting soil recipe is as follows:
- 1 part cheap top soil
- 1 part coco coir or peat moss
- 1 part vermiculite or perlite
- 1 part compost or worm castings
You can mix all of this on a tarp, in a bucket, or wheel barrow. Whatever you have on hand. Peat moss is traditionally used for seed starting mixes, but it’s a non-renewable resource that that is harvested from bogs. Bogs are sensitive ecosystems that are not easily rebuilt, so we prefer to use coco coir in place of peat moss. Coco coir performs the same function but is a byproduct of coconut harvest so it’s more sustainable. Additionally, peat moss is very acidic and can make it difficult to grow some seedlings.
You may consider screening your potting soil for smaller containers such as six cell packs or small 4 inch pots. Store bought topsoil often comes with large rocks or woodchips that can interfere with good root development in small containers. Removing these larger pieces can help your seedlings thrive.
When to start your seeds?
The answer to this question highly depends on what you wish to grow and where you live! The suggested planting timeline here will pertain to Southern Ohio or anyone residing in zone 6 with a humid subtropic environment. In general, the order in which you would plant your seeds will be the same because this order is based on a plant’s resistance to cold. The time frames are based on when our last frost date occurs. If you live south of Ohio, you can plant these seeds earlier, and if you are north of Ohio, you will plant slightly later than us to align with your last frost date.
General planting info about Native plants
Some seeds like native plants or fruits like strawberries will need a cold period before the seeds will sprout. These seeds can benefit from winter sowing. This is involves starting seeds in the fall or winter and letting them sit outside in the cold. You can plant native plants by scattering the seeds on the soil surface in the fall. These seeds won’t sprout until conditions are correct so you just set and forget them until spring.
If you want to control where your native plants will sprout, you can fill some deep containers with dirt and surface sow the seeds. Press them into the dirt and put somewhere outside where they can get rained and snowed on all winter. In the spring the seeds will sprout and you can transplant where you want them once the seedlings appear to be strong enough.
General info about annual garden fruit and vegetable plants
If you are interested in annual garden vegetables some seeds can be started indoors in the winter, while other seeds don’t transplant well and must be started directly in the ground.
Cold hardy plants that can be transplanted
Seeds that can be started indoors in mid February.
- Cole crops: broccoli, cauliflower, cabbage, kohlrabi, pak choi, brussels sprouts
- Greens: lettuce, spinach, swiss chard, kale, collards, mustard greens
- Herbs: cilantro, parsley, chives, thyme, oregano, rosemary, sage, celery, green onion, dill, fennel
- Alliums: Onions, leeks
These seedlings started in late winter can be transplanted into the ground when the soil can be worked in early April. These plants thrive in cold and will actually struggle to grow in the heat of summer so it’s best to get these transplanted earlier. You may consider covering the cole crops with row covers to prevent attack by the cabbage moths.
Cold hardy plants that must be direct sown
Seeds that can be started outside as soon as the ground thaws (typically late March/early April)
- Legumes: Peas
- Root veggies: radish, beets, turnips, carrots, potatoes, parsnips
These plants don’t transplant well so they must be started in the ground.
Frost sensitive plants that can be transplanted
Seeds that can be started indoors in late February/early March
- Veggies: tomatoes, eggplant, peppers
- Herbs: basil, savory, thyme, oregano, sage, lemon grass, lemon balm, mint, etc
Seeds that can be started inside in late March/early April
- Squash: pumpkins, gourds, cucumbers, zucchini, summer squash
- Melons: watermelon, cantaloupe
- Okra
These plants grow very fast and form a large tap root so they don’t need as much time in the pot. They won’t transplant as well after a certain size. The above can also be direct seeded into the ground in early May. These items sometimes may have issues transplanting due to their large tap root so if you choose to start these indoors, use a large, deep container and be careful not to disturb the tap root when transplanting. If you have the garden space, you can also plant a few plants you started indoors and direct sow some seeds. This way you have can have an extended harvest as the direct sown plants will produce later than the earlier transplanted plants.
Once all chance of frost has passed you can transplant all frost sensitive plants such as tomatoes, peppers, basil, etc.
Plants that are best direct sown in May
- Corn
- Beans
- Sweet potato slips
- Sunflowers
These plants don’t transplant well and are best saved for when the soil warms up in late spring.
Special considerations for seed starting
If you want to invest in your seed starting you may find these items helpful.
-
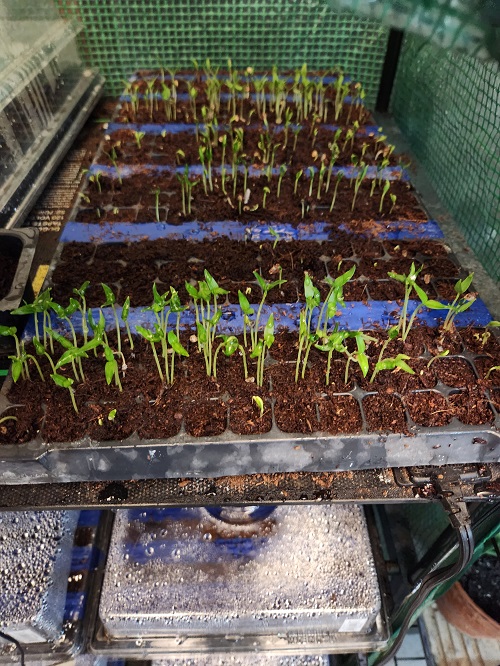
Heat mat: heat mats help seeds pop faster and are almost required for super hot peppers. Some super hot peppers can take up to 30 days to sprout but this time can be cut down to 8-14 days with a heat mat. Some herbs and other hard to start seeds can also be encouraged to germinate with a heat mat.
-
Fan: seedlings that are started indoors will not have any exposure to wind. This can make their stems weak. Putting a fan on the seedlings for a constant, gentle breeze will help the seedlings strengthen their stems so they won’t be as difficult to transplant.
-
Grow lights: depending on where you start your seedlings, you may need to have grow lights. If you can’t start your seeds next to a nice sunny window, you will want grow lights that have red and blue spectrum to help your seedlings grow.
-
Humidity dome: Some seeds like peppers or herbs will germinate better in a more humid environment. A humidity dome is just a clear cover with some holes to let humidity escape.
-
Mycorrhizae: this is a natural fungus that bonds with the roots of growing plants. It forms a mutually beneficial relationship by living on the edges of the roots and giving the plant the ability to digest more nutrients. This fungus is found abundantly in old growth forests and can help give you strong and healthy plants and reduce the need for fertilizer.
-
Fertilizer: plants grown in pots have a limited supply of nutrients. Their roots can’t spread out to find more nutrients like they can in the ground. Amending your potting soil with fertilizer can help your seedlings take up more nutrients. You can use pelletized or liquid fertilizer or if you prefer more natural options fish emulsion fertilizer or compost work well and are often less expensive.
-
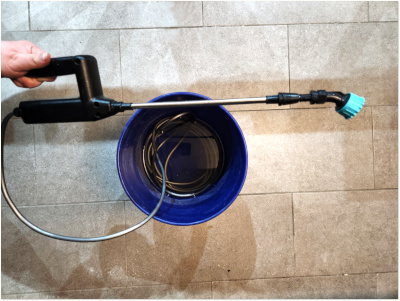
Watering can/wand: while you can use a cup or whatever vessel you have lying around, sometimes a watering can or an electric watering wand can be nice depending on how many plants you need to water. Watering cans can help provide a more gentle shower for when plants are small. Watering wands can be used to water from a large 2-5 gallon bucket.
What are any other considerations before I plant my seedlings?
-
Do you have enough garden space for everything you wish to plant? If not, do you have enough space to maintain some plants in pots? Understanding how much space each plant needs can help set your garden up for success.
-
What are the space and depth requirements for the plants you want to grow? Some plants put down very deep roots and do better in the ground. Examples include tomatoes, basil, almost all native plants. Some plants do well with crowded spacing (green onions, salad, herbs), while other plants may grow better with a trellis (tomatoes, cucumbers, melons, etc) to give you more space in the garden. Knowing what each plant needs will help you plan where to plant your seeds and seedlings.
-
Are you trying to plant a specific number of a certain plant? For example, if you want to have at least 10 roma tomato plants, you may need to plant more than 10 seeds because you typically don’t get 100% of the seeds to sprout. Some seed companies will list the germination rate on the seed packet or website. You can use this information to plan how many seeds you need to plant. For example, if your seed pack listed 75% germination, then about 25% of the seeds will not sprout. If you wanted 12 plants, then you would need to plant at least 15 seeds in order to account for the 3 seeds that will likely not sprout. If this information isn’t listed on your seed packet or your seeds packets are old, you can calculate your own germination rate by wetting 10 seeds in a paper towel and waiting the appropriate amount of time for your seed to germinate. Then simply count how many seeds sprouted and divide by the total number started. Write this information and the date tested for your future records. We only do this step if ample seed is available.
-
Do you have the correct climate for the plant you want to grow? Some plants are perennials in warmer climates but must be grown as annuals in colder climates. For example, rosemary is a Mediterranean plant that cannot survive temperatures below 15F. If your area gets colder than this in the winter, rosemary will likely not survive the winter. Plants that are not suitable for your area can either be over wintered in a pot or grown with the understanding that winter weather will kill them.
We hope this helps you start your garden. Come see us this spring for heirloom fruit and veggie starts, native plants, or unique and interesting herbs!